Implementing Video Playlists with VdoCipher in React Native
Overview
This guide will walk you through the implementation of a playlist feature in a React Native app using the vdocipher-rn-bridge library. The playlist allows users to play a series of videos one after another, with the ability to switch between them using a FlatList.
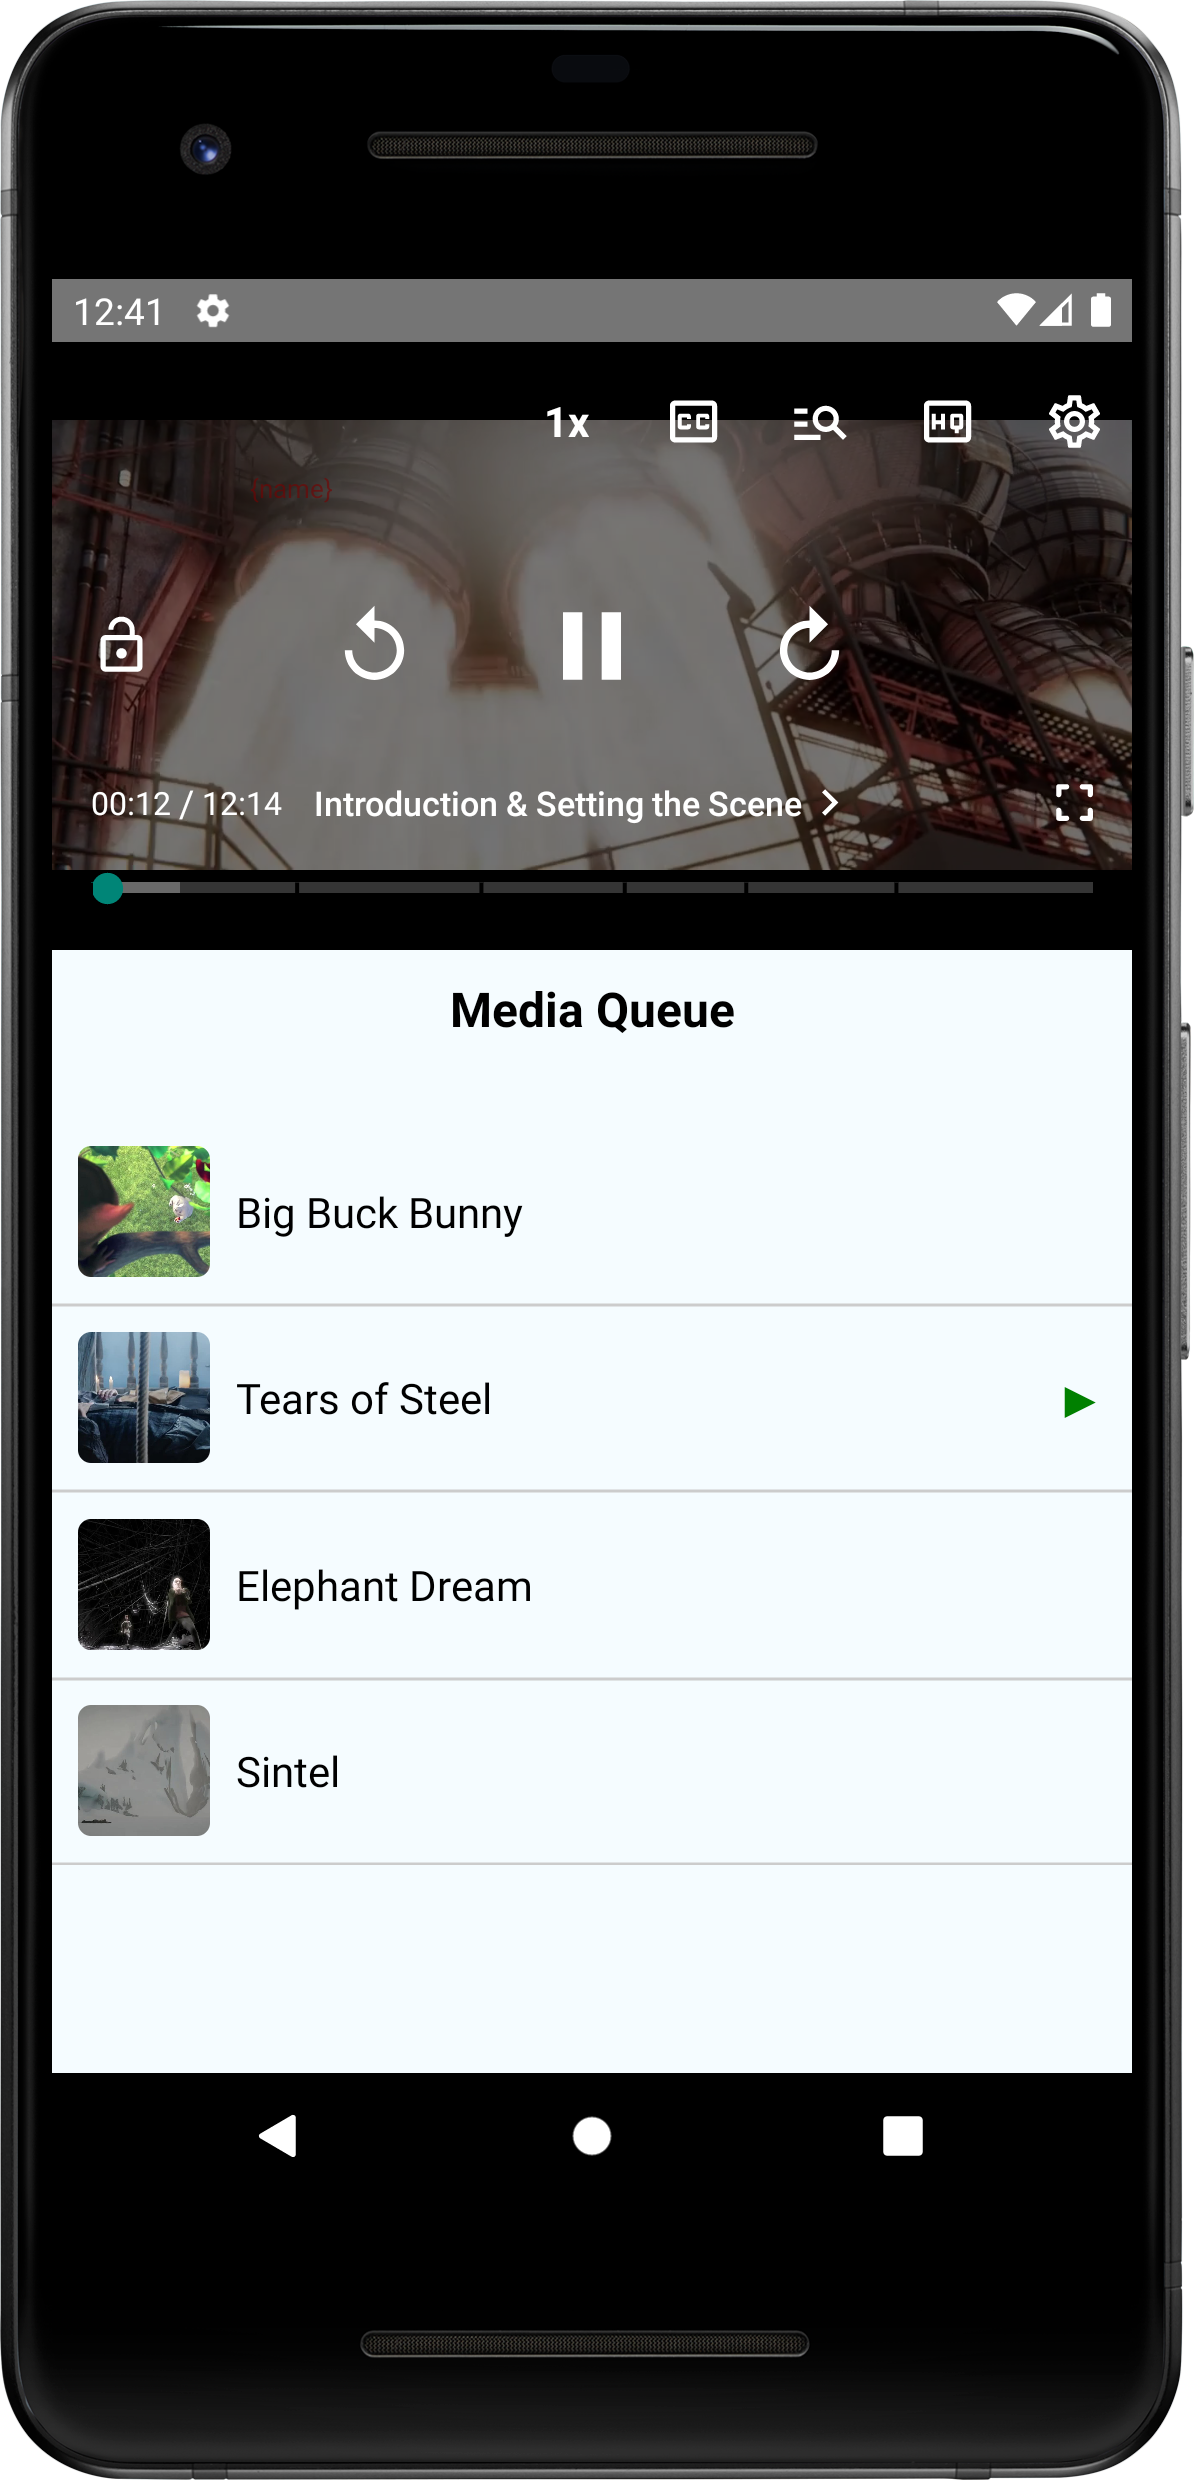
We'll walk through creating a video playlist using VdoPlayerView. The playlist will allow users to browse and play videos, where each video will automatically switch to the next one when it ends. Additionally, when the playlist reaches the last video, it will loop back to the start and continue playing from the first video again.

Step-by-Step Implementation
1. Setting Up the VdoCipher React Native Library
Ensure that the vdocipher-rn-bridge library is integrated into your project. Follow the official integration guide if you haven't done so already.
2. Playlist Configuration
Define the video playlist with the necessary video details, such as otp, playbackInfo, title, and poster URL for each video:
const PlaylistPlayer = () => {
  const [currentVideoIndex, setCurrentVideoIndex] = useState(0);

  const videoPlaylist = [
    {
      id: 'video1',
      otp: 'your-otp-1',
      playbackInfo: 'your-playback-info-1',
      title: 'Video 1',
      poster: 'https://example.com/poster1.jpg',
    },
    {
      id: 'video2',
      otp: 'your-otp-2',
      playbackInfo: 'your-playback-info-2',
      title: 'Video 2',
      poster: 'https://example.com/poster2.jpg',
    },
    {
      id: 'video3',
      otp: 'your-otp-3',
      playbackInfo: 'your-playback-info-3',
      title: 'Video 3',
      poster: 'https://example.com/poster3.jpg',
    },
    {
      id: 'video4',
      otp: 'your-otp-4',
      playbackInfo: 'your-playback-info-4',
      title: 'Video 4',
      poster: 'https://example.com/poster4.jpg',
    },
  ];
3. Render Method
Use the renderVideoItem method to render each video item in the playlist with its title and poster image. Highlight the currently playing video with a "playing" icon:
const renderVideoItem = ({item, index}) => {
  const isPlaying = index === currentVideoIndex;
  return (
    <TouchableOpacity
      onPress={() => handleVideoSelection(index)}
      style={styles.videoItem}
    >
      <Image source={{uri: item.poster}} style={styles.poster} />
      <View style={styles.videoInfo}>
        <Text style={styles.videoTitle}>{item.title}</Text>
        {isPlaying && <Text style={styles.playingIcon}>▶</Text>}
      </View>
    </TouchableOpacity>
  );
};

const handleVideoSelection = (index) => {
  setCurrentVideoIndex(index);
};
4. Player and List UI
Render the player and the playlist with the FlatList component. The player automatically moves to the next video once the current video ends:
  return (
    <SafeAreaView style={styles.container}>
      {/* VdoCipher Player */}
      <VdoPlayerView
        ref={(player: any) => (_player = player)}
        style={styles.videoPlayer}
        embedInfo={videoPlaylist[currentVideoIndex]}
        onMediaEnded={playNextVideo}
      />

      {/* Media Queue Heading */}
      <Text style={styles.heading}>Media Queue</Text>

      {/* Video List Below Player */}
      <FlatList
        data={videoPlaylist}
        renderItem={renderVideoItem}
        keyExtractor={(item) => item.id}
        style={styles.videoList}
      />
    </View>
  );
5. Playing the Next Video
The playNextVideo method is triggered when a video finishes, automatically playing the next one in the playlist. When the last video ends, it loops back to the first video:
const playNextVideo = () => {
  setCurrentVideoIndex((prevIndex) => (prevIndex + 1) % videoPlaylist.length);
};
6. Styles
Here’s how to style the component to properly display the player, media queue heading, and video list with poster images:
const styles = StyleSheet.create({
  container: {
    flex: 1,
    justifyContent: 'center',
    alignItems: 'center',
  },
  videoPlayer: {
    width: '100%',
    height: 200,
  },
  heading: {
    fontSize: 18,
    fontWeight: 'bold',
    marginVertical: 10,
    textAlign: 'center',
  },
  videoList: {
    marginTop: 10,
    width: '100%',
  },
  videoItem: {
    flexDirection: 'row',
    alignItems: 'center',
    padding: 10,
    borderBottomWidth: 1,
    borderBottomColor: '#ccc',
  },
  poster: {
    width: 50,
    height: 50,
    marginRight: 10,
    borderRadius: 5,
  },
  videoInfo: {
    flex: 1,
    flexDirection: 'row',
    justifyContent: 'space-between',
    alignItems: 'center',
  },
  videoTitle: {
    fontSize: 16,
  },
  playingIcon: {
    fontSize: 20,
    color: 'green',
  },
});
Summary
This example demonstrates how to create a sequential playlist in React Native using vdocipher-rn-bridge, complete with posters, automatic video progression, and a media queue. By following this example, you can easily integrate similar functionality into your own apps using the VdoCipher SDK.
For the complete implementation, you can find the source code on Github.
Feel free to customize and expand upon this implementation to suit your application's specific needs.
If you have any questions or need further assistance, please contact us at support@vdocipher.com